Dungeon Settlers Red Monster Rat Guide: Stats, Swarm & Strategy
How to beat the Red Monster Rat in Dungeon Settlers — reported stats, Rat Swarm and bleed abilities, quest context, gear checks, and pull tactics.
FAQ
Is the Red Monster Rat a boss or an elite?
What level should my party be for the Red Monster Rat?
What gear do I need for the Red Monster Rat?
The Red Monster Rat is the first fight in Dungeon Settlers that checks whether your settlement is actually working. It’s an elite of the Veil of Silence — the game’s first region — and the Main7 story beat of the Crawling Doom chain. The fight is referenced in official material: a quest panel reading “…eat Red Monster Rat” appears in a press-kit screenshot of the Consume Policy screen, and another official screenshot shows a map location labeled Red Rat.
Where does the fight sit in the story?
The Crawling Doom chain walks you straight into it, per community documentation of the quest order:
- Main6 — build the Research Station (see the research guide for what to unlock first)
- Main8 — two units at level 2+ (the game pops this around the same time; if it fires before Main7, your save is fine)
- Main7 — kill the Red Monster Rat
The kill ends the tutorial story but does not unlock the next region — region gates run on a separate chain, so there’s no need to rush the fight before your party is ready. For what waits after, see the boss overview.
What are the rat’s abilities?
| Ability | What it does (community-documented) |
|---|---|
| Bloody Scratch | Melee hit that applies stacking bleed — unguarded melee characters drain fast without ointments |
| Rat Swarm | Summons adds mid-fight; the swarm call is the fight’s punctuation mark |
| Enrage | Below roughly 30% HP its attack speed jumps — hold burst cooldowns for this threshold |
Bleed is one of the four core status effects, and this fight is where it stops being theoretical.
How do you prepare?
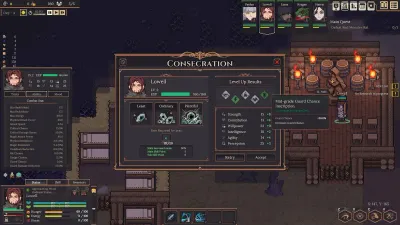
- Levels: two settlers at 2+ is the gate; a full level-2 squad is the comfort target. Short on levels? Pray with lesser mana stones — a Least blessing is acceptable, Plentiful is greed before an elite (leveling & prayers explained)
- Gear: Bone or Carapace tier. The crafting chain runs Cloth → Bone/Carapace → region metal (crafting guide)
- Supplies: ointments and aid kits for bleed, food that matches your racial diets
- Party: a shield guard up front, one physical striker, ranged damage (bow or caster) behind — the standard week-one comp
How do you actually pull the fight?
The community pull script, step by step:
- Clear patrols first — never open the elite fight with trash still alive in the room
- Park the guard in a doorway or against a wall, at line of sight to the rat
- Open with Provoke or a stun so the rat locks onto the shield, not your archer
- Keep ranged outside swipe range — bleed punishes melee loitering
- When the swarm animation starts, pause immediately — retarget: the guard holds the elite, ranged clears adds, and nobody chases runners into the next room
- If the guard drops under a third HP, retreat to a prior hallway — don’t burn cooldowns in a bad spot; the dungeon isn’t going anywhere
- Loot and portal out after the kill unless depletion and party mood are both still healthy
What do you get, and what then?
No dedicated drop table is documented — community guidance is simply “loot, then portal,” and spend the haul on beds and research rather than decorations. The aftermath checklist: rotate floors so the Veil of Silence doesn’t deplete, recruit a spare settler because death is permanent, and start gearing toward the Giant Stone Golem waiting on floor 5.

Tutorial - Learning the Game | #1 Dungeon Settlers
Where to go next
- All Bosses & Elites in Early Access — the full roster
- Giant Stone Golem Guide — the floor-5 fight this prep is building toward
- Party Comp Tier List — role coverage for four slots
Gallery
Related Articles
updates
Dungeon Settlers Update v0.4.29: Build Rebalance, Growth Buff, and QoL Wave
Dungeon Settlers patch v0.4.29 caps barriers at 200% of max health, applies cooldown reduction to the global cooldown, and buffs recruit growth.

news
Dungeon Settlers at Tokyo Game Show 2026: Booth 09-E33
CanOpener showed Dungeon Settlers at Tokyo Game Show 2026 — Indie Game Area, Booth 09-E33, playable on-site with the developers in attendance.
mechanics
Dungeon Settlers Inscriptions Guide: Odds, Rerolls & the Lock
How inscriptions work in Dungeon Settlers — rarity tiers and roll odds, the Consecration lock, born-with recruit surcharges, and the community balance debate.
Was this helpful?
Thanks for the feedback!